EnergyWise-RI

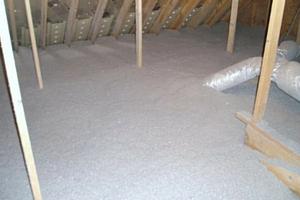
The attic is the easiest place to add insulation to improve overall comfort and the energy efficiency of your home. Cellulose insulation is the product most often used when adding insulation to existing attics. Cellulose is essentially shredded recycled paper treated to be fire retardant and repel pests. Cellulose has tremendous insulating and sound deadening qualities.
Unless there is fourteen inches of existing insulation in your attic you are under insulated by today's building codes.
Professionally installed attic insulation should include the following steps:
- Air sealing: Before adding insulation our technicians lift the existing insulation and seal any cracks or penetrations leading to the living space below. This will prevent both conditioned air and moisture from the living space from finding its way into the attic space.
- Mechanical venting: Our technicians make certain that bath fans and dryers which may be venting through the attic are properly vented to the outside. Improper venting of bath fans and dryers is a known cause of mold in attics.
- Passive venting: Our technicians calculate the existing attic ventilation (roof vents, soffit vents, gable vents etc.…) and add more venting if necessary. As part of this process we make certain that none of the existing vents are blocked or otherwise not functioning properly.
- Storage: If there is a need to maintain storage within the attic space our technicians can build a suitably sized raised platform for this purpose. This will permit storage on the top of the platform while letting us insulate below the thus allowing for a seamless and insulation install.
- Installing the insulation: A blanket of cellulose is blown over the existing insulation. The thickness of the blanket depends on the amount of existing insulation. Cellulose like all other types of insulation is most effective when seamless and uninterrupted, effectively filling every nook and cranny.
- Attic access: The attic access, whether a small hatch, standard size door or folding stairway is insulated using rigid foam board and then weather-stripped.
Best of all are the huge rebates of up to 75% for attic insulation and up to $750.00 for air sealing. We all pay for these rebates through the “Energy Efficiency Charge” each time we pay our utility bill. If you heat with natural gas then you pay this charge twice each month. So why not take full advantage of this program that you help pay for.
Remember: In addition to great rebates and other incentives offered by your utility company they also offer 0% financing to qualifying customers. Financing that can be used to pay for any eligible energy improvement upgrade.
When you decide it’s time to add insulation to your attic or if you would like more information about Weatherization, call Energy geeks at (401)-766-1540 or contact us online and let one of our friendly and knowledgeable field representatives come to your home and give you a no-cost energy assessment.
Garage Ceiling Insulation-and The Cold Rooms Above
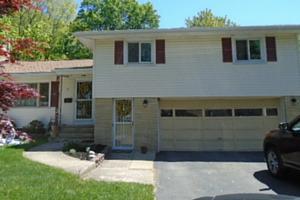
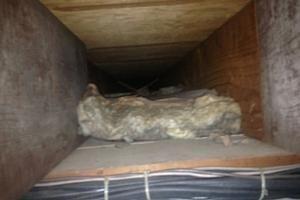
Many homes are built with living space above a garage (see graphic A). Unfortunately, rooms above (often bedrooms) garages tend to be cold in the winter. Graphic B below, clearly shows why. Notice how the insulation is laying on top of the garage ceiling rather than touching the bottom of the heated floor above. Notice also the space between the insulation and the floor above. This empty cavity allows cold air to continuously circulate robbing heat from the room above. This a common problem in most homes of this type. Fortunately, this situation is easily rectified by packing the cavity with insulation. The method for accomplishing this is similar to insulating empty wall cavities (see graphic C).
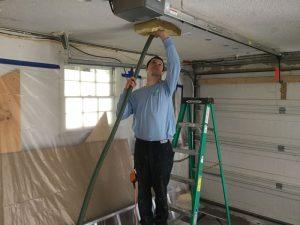
The method for insulating a cold room above a garage is described as follows:
- Small holes are drilled into the underside of the garage ceiling
- A flexible tube connected to an insulation blowing machine is inserted and the cavity is packed tight.
- A foam plug is then inserted into the hole and a coat of plaster is applied.


